
Download It in Beta Today
While Niagara is not production-ready in its current Beta state, we encourage you to try out many of its amazing features today. Before you begin, you will need to enable the Niagara Plugin via the Plugin Manager to do so.
In the rest of this post, we'll explore how Niagara stands out from its predecessor Cascade and scratch the surface of what it can do.
What Exactly is Niagara and Why Did We Make It?
On a high level, Niagara is a fully-programmable, lightweight VFX editor that offers node-based editing and creation alongside a modular VFX stack for easy reuse and inheritance. It supports HLSL (high-level shading language) expressions, data interfaces to other aspects of the Unreal pipeline such as static and skeletal mesh information, and introduces new tools like a Sequencer timeline.
What makes Niagara extremely customizable is that particle emitters, the building blocks of particle systems, can now have unique attributes that are arbitrarily linked to each other within a particle system. This allows you to drive different aspects of a VFX simulation by indexing particle attributes to a characteristic of your choice. For instance, you can use dynamic inputs to link a particle attribute such as acceleration, color, size, or orientation to any arbitrary data such as particle speed, the distance between two objects, or the motion of a bone on a skeletal mesh. With pre-built modules included in the editor, we provide full access to all of the common particle attributes, and adding new behaviors is as simple as writing yourself a new, reusable module which can then be included in any number of future effects.
Transitioning from Cascade to Niagara, it's useful to think about particles as buckets of individual attributes. Each of those attributes -- a particle’s color, size, velocity, or something arbitrary that you create, like an attribute for how far a particle is from the system which created it -- is a tool to be harnessed not just as something you can set but as data you can use to drive other aspects of your simulation or rendering. Artists who step into the Niagara editor for the first time will need to think about vectors, transforms, unit measurements, Boolean principles, and simple logic flow such as “if this happens, then that happens.” Fortunately, we give you the tools and modules to talk directly to all of these variables with an easy-to-understand, accessible UI.
In Niagara, we designed emitters to be independent actors that are saved within the Content Browser. This creates a modular workflow and means that data can be shared with other Niagara Systems that you want to create. Make a spark shower effect you’re happy with once, and then reuse it across any number of emitters. Need to optimize a bit? Modify that source emitter, and those changes, if desired, can propagate across your entire project or simply stay local to the single system you want to modify. In general, this allows artists to make wide-reaching relational edits much more rapidly and with less hassle.
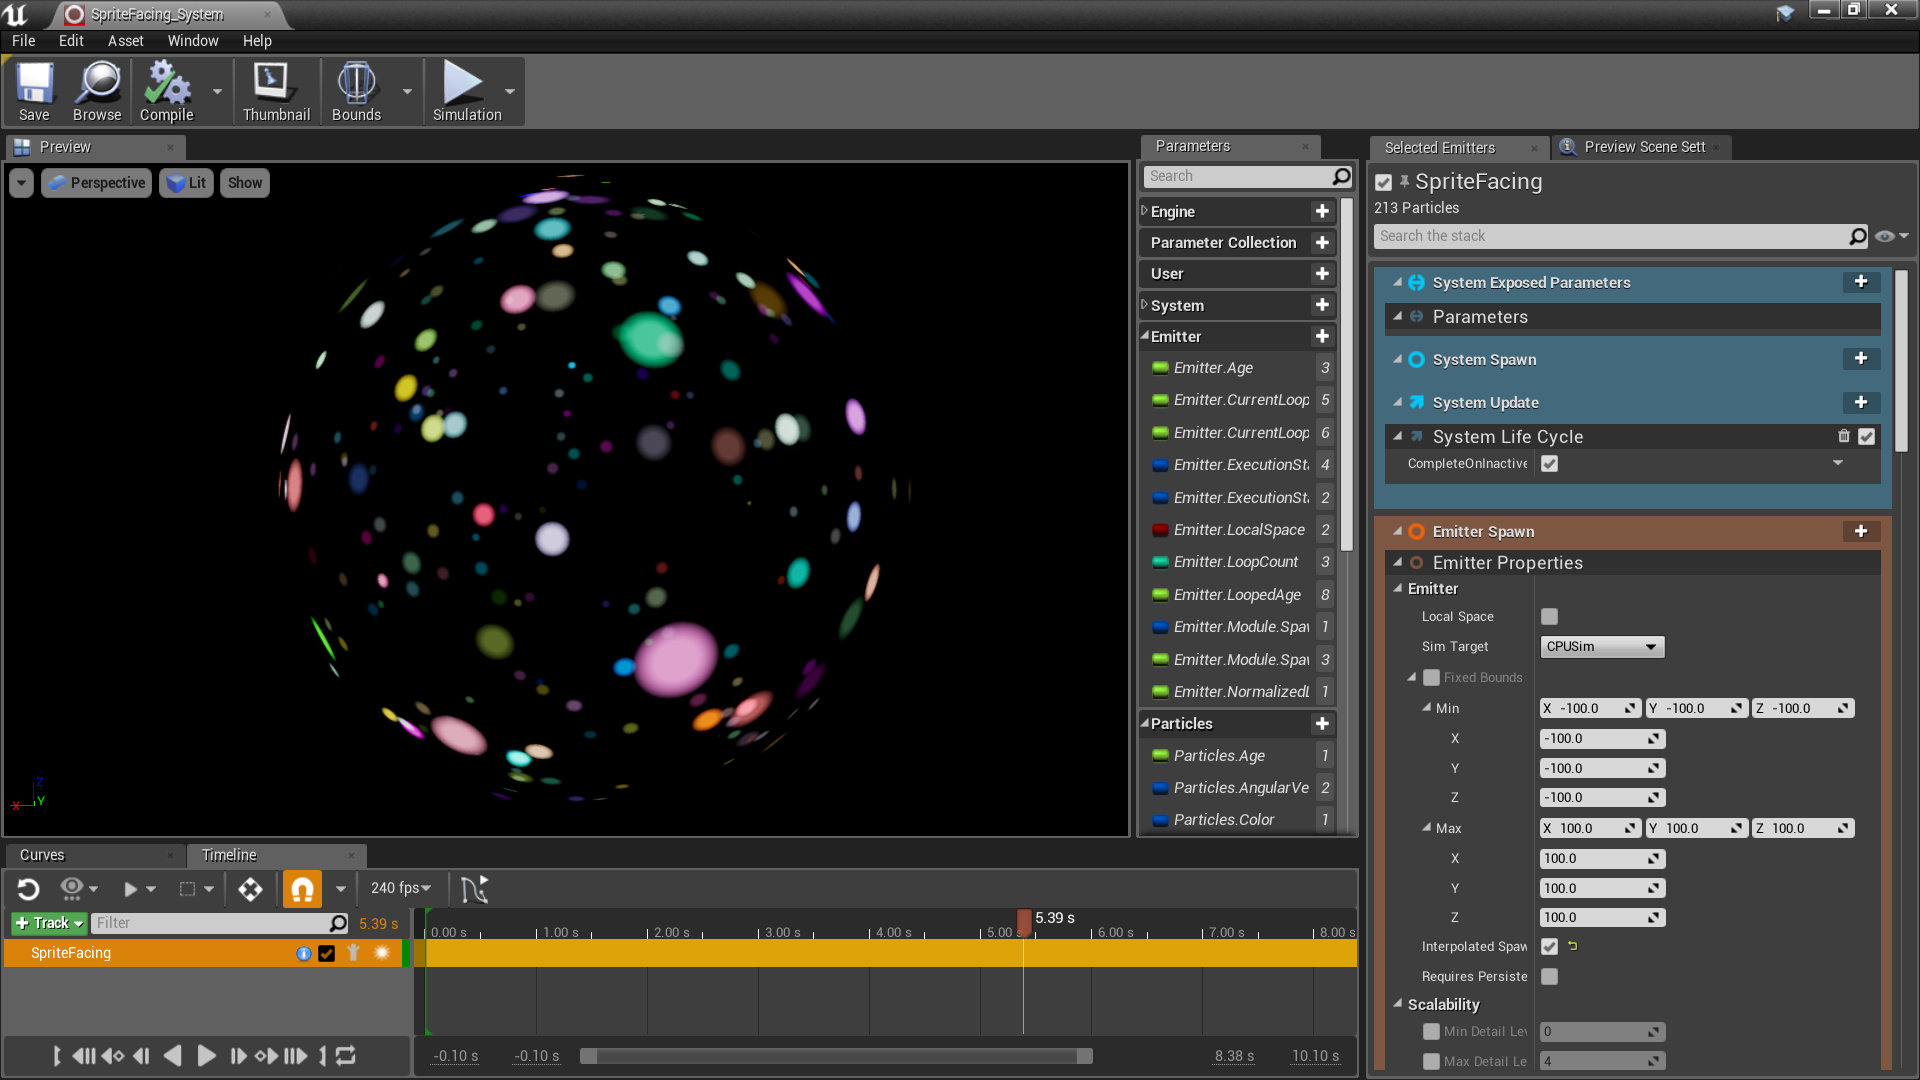
Taking a page out of the video-editing industry, Niagara also introduces a Sequencer timeline. It acts as a chronological preview mechanism that enables you to scrub forwards and backwards in emitter relative time. Control the pacing of your effect in a visual way, set keyframes for spawning or bursting, and stagger emitter timing by dragging. You can also adjust your desired FPS so that you can advance frames granularly to make meticulous observations via the preview viewport.
Specific Examples
There are numerous Niagara simulation examples contained within the Niagara Content Examples in the Unreal Engine Learn tab on the Epic launcher. These show a number of different aspects of the tool, including sprite and mesh rendering, attribute blending, expressions, collisions, beams, mesh reproduction, events, and more.

Blend Attributes Using Arbitrary Data From Your Simulation
As mentioned above, the most fundamental way to see Niagara is as a big container for attributes. Some of those are per-particle attributes (color, size); some are per-emitter attributes (Where is the particle system in the world? Which direction is it facing?); and some come from the engine itself (How much time has elapsed since the engine started up? Is the user providing input?)
One of the most direct examples in the Niagara content example hallway shows just that, with particles that change color and size as they drift further and further away from the center of the emitter that owns them. You’ll see this type of control on display through each of the various examples as particle orientation, velocity, scale, color, and the parameters of the materials that are applied to the particles themselves are all controlled dynamically by interesting data coming out of the simulations or being fed in from Blueprint or gameplay code.

Given the way Niagara is designed, if you don't see what you're looking for while working with our provided preset modules, we encourage you to create and share your own custom ones.
Beams
While Beams were their own object in Cascade, in Niagara they are simply a way to link particles together in a visual way. This allows them to be more programmable and influenced by forces and any other aspects of the simulation as each segment of the beam is itself still a simulated point just like any other particle. We have Static Beam presets for fixed endpoints, as well as Dynamic Beams which have endpoints and tangents that are recalculated every frame.

The current Beta build of Niagara provides setup modules that can handle Beams and shows how their behavior can be tweaked and customized.
A New Way to Render Particles
Once Niagara has run one simulation, it can drive multiple renderers using that data. For instance, going back to Beams, you can choose to render the individual particles that make up a Beam, just the Beam's overall ribbon shape, or both. Running one simulation while being able to render it multiple times is a standout feature for both visual reasons and performance benefits compared to Cascade.
Basic Collision Events
If you're planning to construct particles that collide into each other or other meshes, we've included some basic particle collisions modules to get you going. You'll notice that these modules are broken up into modular chunks that allow you to tweak aspects like bounce and rest behavior and, more importantly, expose the results of a collision to users without requiring the particles to act on it in a predetermined way. This means you have total control over what happens when a collision is detected. Want to change the color of a particle when it collides, but don’t want it to bounce? The choice is yours.

Conclusion
Niagara is a powerful, highly customizable and programmable tool that's able to create complex visual effects while being lightweight and relatively simple-to-use. You can download and play around with it in Beta now. Rest assured, we will continue to improve it over time to fix bugs and to make it more performant. We want to provide many more simple modules which cover the primary needs of any working VFX artist, and expose as many aspects of the engine to the simulation via data interfaces, giving power users all the control they need to make something extraordinary.
If you enable the Plugin, please provide us with your feedback as to how we could improve it. You should also stay tuned for future livestreams where we continue to dive deeper into the power and capabilities of the tool.