How to do keyframe animation in Unreal Engine

If you want to do keyframe animation with Unreal Engine, you’ve come to the right place! Here we’ll discuss keyframe animation, then get into the steps of how to do it.


What is keyframe animation?

On your journey to learn how to animate, you have most likely encountered the term keyframe. But what is a keyframe exactly, and how does it relate to animation? 

Animation consists of frames, a series of drawings, renderings, or photos that when played back at high speed are interpreted by the human eye as continuous movement. The concept is the same as that of filmed movies, where individual images on a film strip are played back at high speed to create the illusion of motion.
When creating animation, artists often use keyframes to help control animation timing. A keyframe sets the start or end point of a transition, so that the frames in between can be filled in separately. For example, suppose you want a character to raise its arm over a period of one second. Games are often made to animate a rate of 30 frames per second (fps), meaning it takes 30 images or frames to create a single second of motion. To make the character raise its arm over one second, you would set a keyframe on frame 1 and another keyframe on frame 30. When you play back your work in your animation software, the frames in between those two keyframes will be automatically “filled in,” and the arm will rise smoothly over the one-second period.

In the days when animation was drawn by hand, senior animators would set the keyframes and junior animators would draw the frames in between. In computer animation, the artist sets keyframes and the software fills in the frames in between. For more advanced workflows where the team wants more control over the output, they can also use performance capture, game mechanics, etc.
 

Animating with Unreal Engine

Unreal Engine is a game engine. While originally created as a platform for 3D game development, it includes so many animation features (including keyframes) that it’s starting to become the main tool a lot of studios use to create their content

Follow these steps to start making your first animation in Unreal Engine. In this lesson, we’ll animate a sliding door. And make sure to check out this hotkeys/settings guide sometime, it will save you a lot of time.
 

Requirements

All the tools and assets needed for this tutorial are free to download, but you will need at least 36 GB of free disk space, on a fairly robust computer, to use them. See the Unreal Engine documentation for details on hardware requirements.

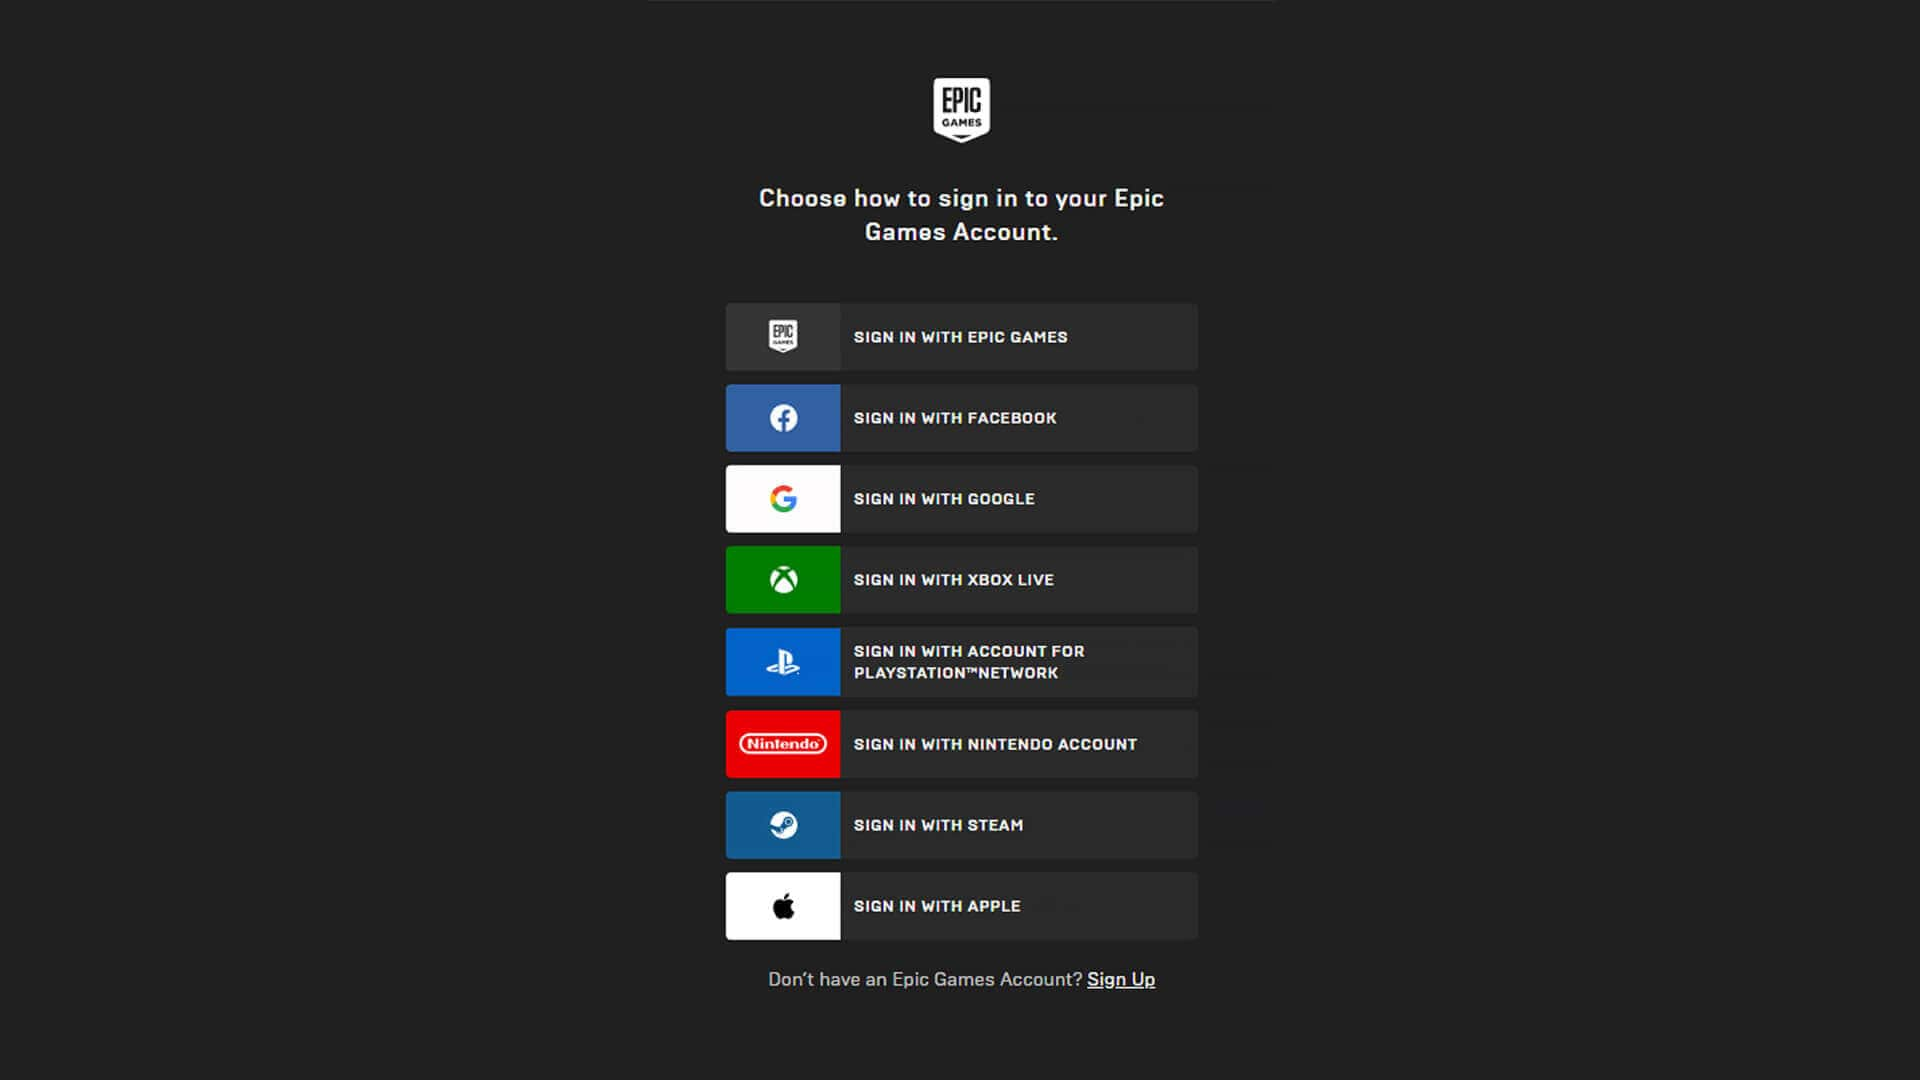
Before you begin, you’ll need to download and install the Epic Games launcher and install Unreal Engine. When you run the launcher for the first time, you’ll be asked to sign in or create a free Epic Games account. Choose the sign-in method that suits you best.
To install Unreal Engine, click the Unreal Engine tab at the left, then click Install Engine at the upper right of the launcher. Wait a few moments while the latest version of Unreal Engine installs. To save on disk space, you may choose to install only the required components.

You can find step-by-step instructions on how to install the Epic Games launcher and Unreal Engine in this video.
 

How to animate an object

Now that Unreal Engine is installed, you will find a Marketplace scene and open it in the engine. The Marketplace has many assets you can use immediately in Unreal Engine. Assets include objects, characters, images, and audio files.
  1. In the Epic Launcher, click the Marketplace tab.
  2. In Marketplace, search for “Scifi Hallway”.
  1. When you’ve found the asset, click the asset, click Free, then Create Project. On the Choose Project Name and Location dialog that appears, choose a folder location and project name, and click Create. Wait a few moments while the project is downloaded to your computer.
  1. To find and open the downloaded project, click the Library tab at the top of the screen. The Scifi Hallway project should appear on the list. Double-click the project to open it in Unreal Engine. Wait a few moments as the project loads. 
You might see a message at the upper left of the screen that says, LIGHTING NEEDS TO BE REBUILT. You can ignore this message without causing any problems, but if you want to get rid of this message, you can click Build menu > Build Lighting Only and wait for the lighting to be rebuilt (this can take a few minutes). If this message appears at any future time while you are working on the project, you can follow the same instructions to get rid of the message.
Unreal Engine includes a Perspective viewport showing the scene, plus controls above, next to, and below the viewport. If you’ve used 3D modeling software, the viewport and controls system will be familiar.

The viewport shows a number of non-rendering objects such as light objects and reflection spheres.
  1. Click in the viewport and press the G key to hide the non-rendering objects. Now, you can see the actual renderable scene.
  1. Take a few moments to experiment with the viewport navigation controls and explore the scene:
Left mouse button + Drag Moves the forward and backward and rotates left and right.
Right mouse button + Drag Rotates the view.
Left and Right mouse button + Drag Moves up and down, or left and right.

There are several different ways of navigating in the viewport, some of which might be more familiar to you. For example, the standard keys that Maya uses work here, as do the cursor keys. For more viewport controls, see the Viewport Controls help page.
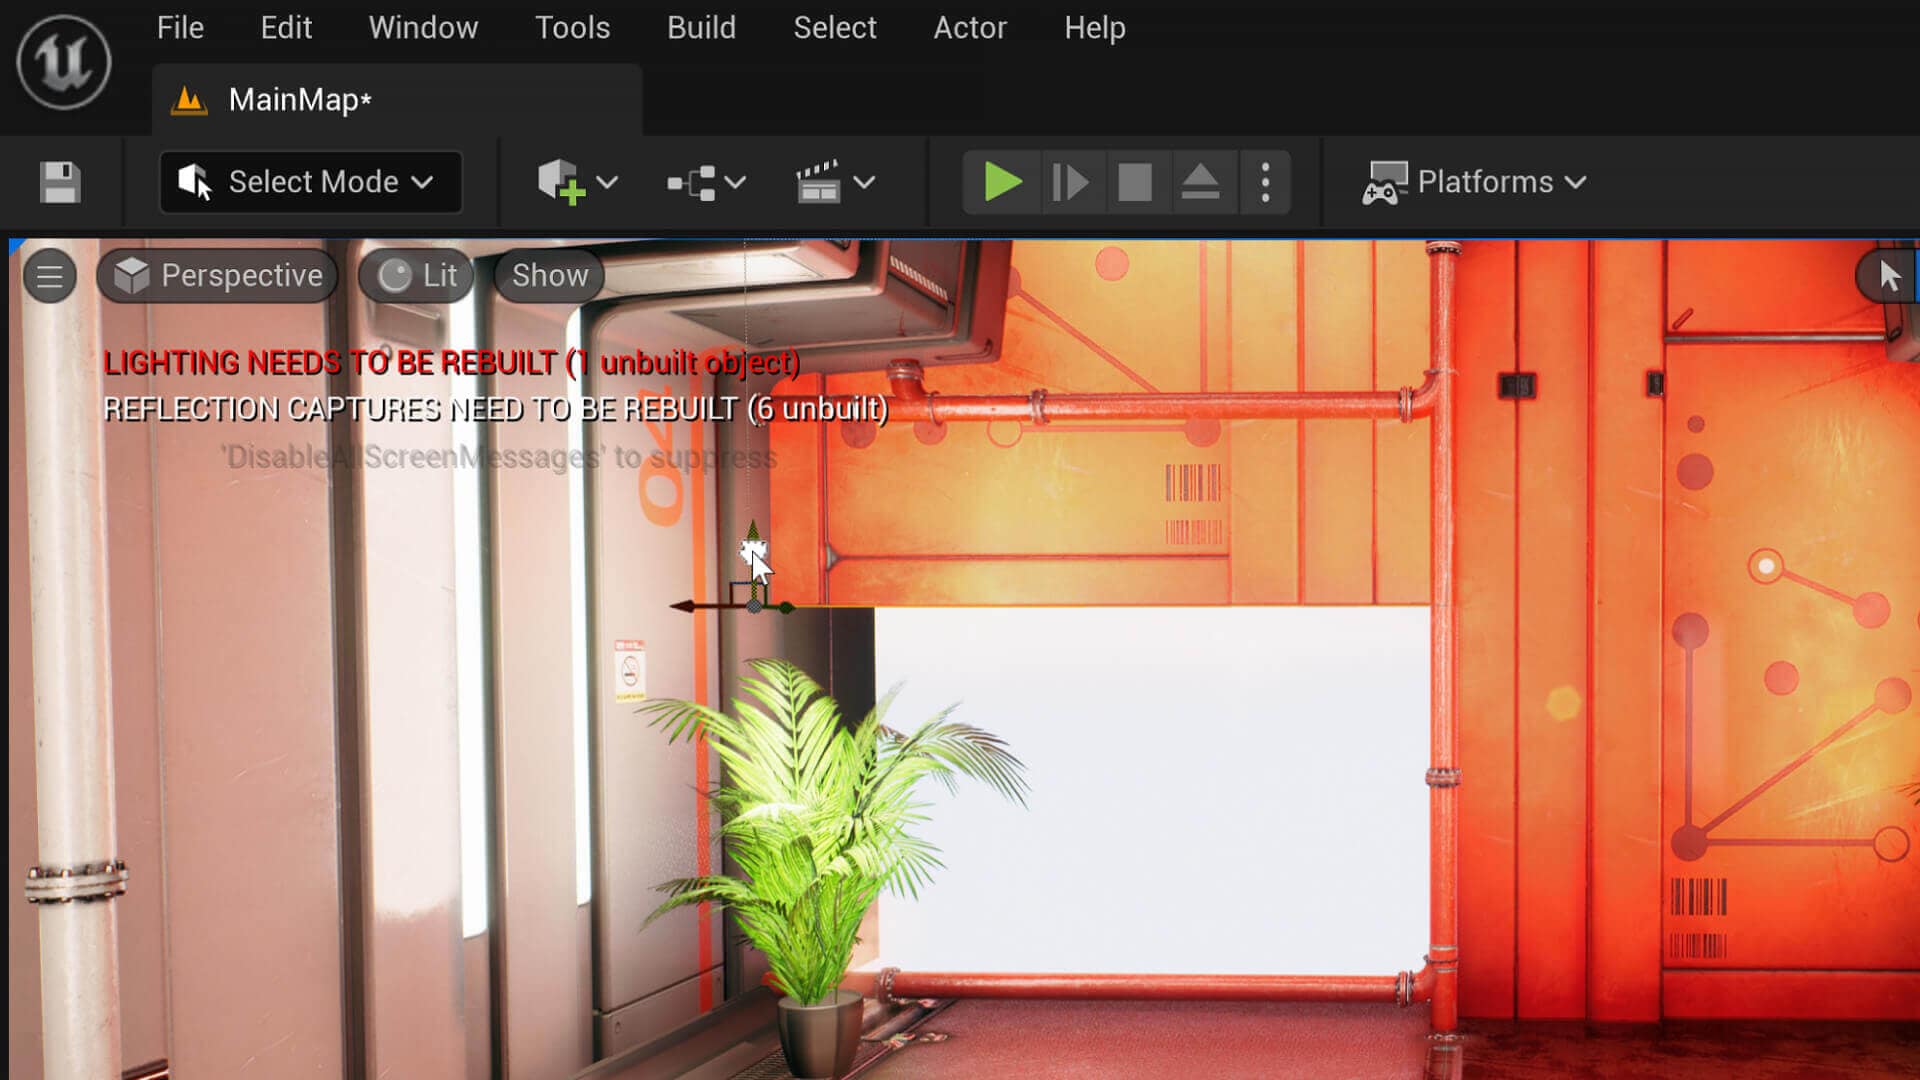
  1. Adjust the view to look similar to the image below, facing the orange doors with plants on either side.
  1. Click on the orange door on the left to select it. In the Outliner window at the upper right of the screen, you will see that the object Fond_Wall_3 is selected. A small set of tripod axes appears at the lower left corner of the door when it is selected.
Note: If you don’t see the tripod axes, press the W button on the keyboard. The tripod axes should appear then.

Next, you will add this object to the Sequencer module so you can animate it. Sequencer serves as a keyframe editor, similar to a nonlinear editor.
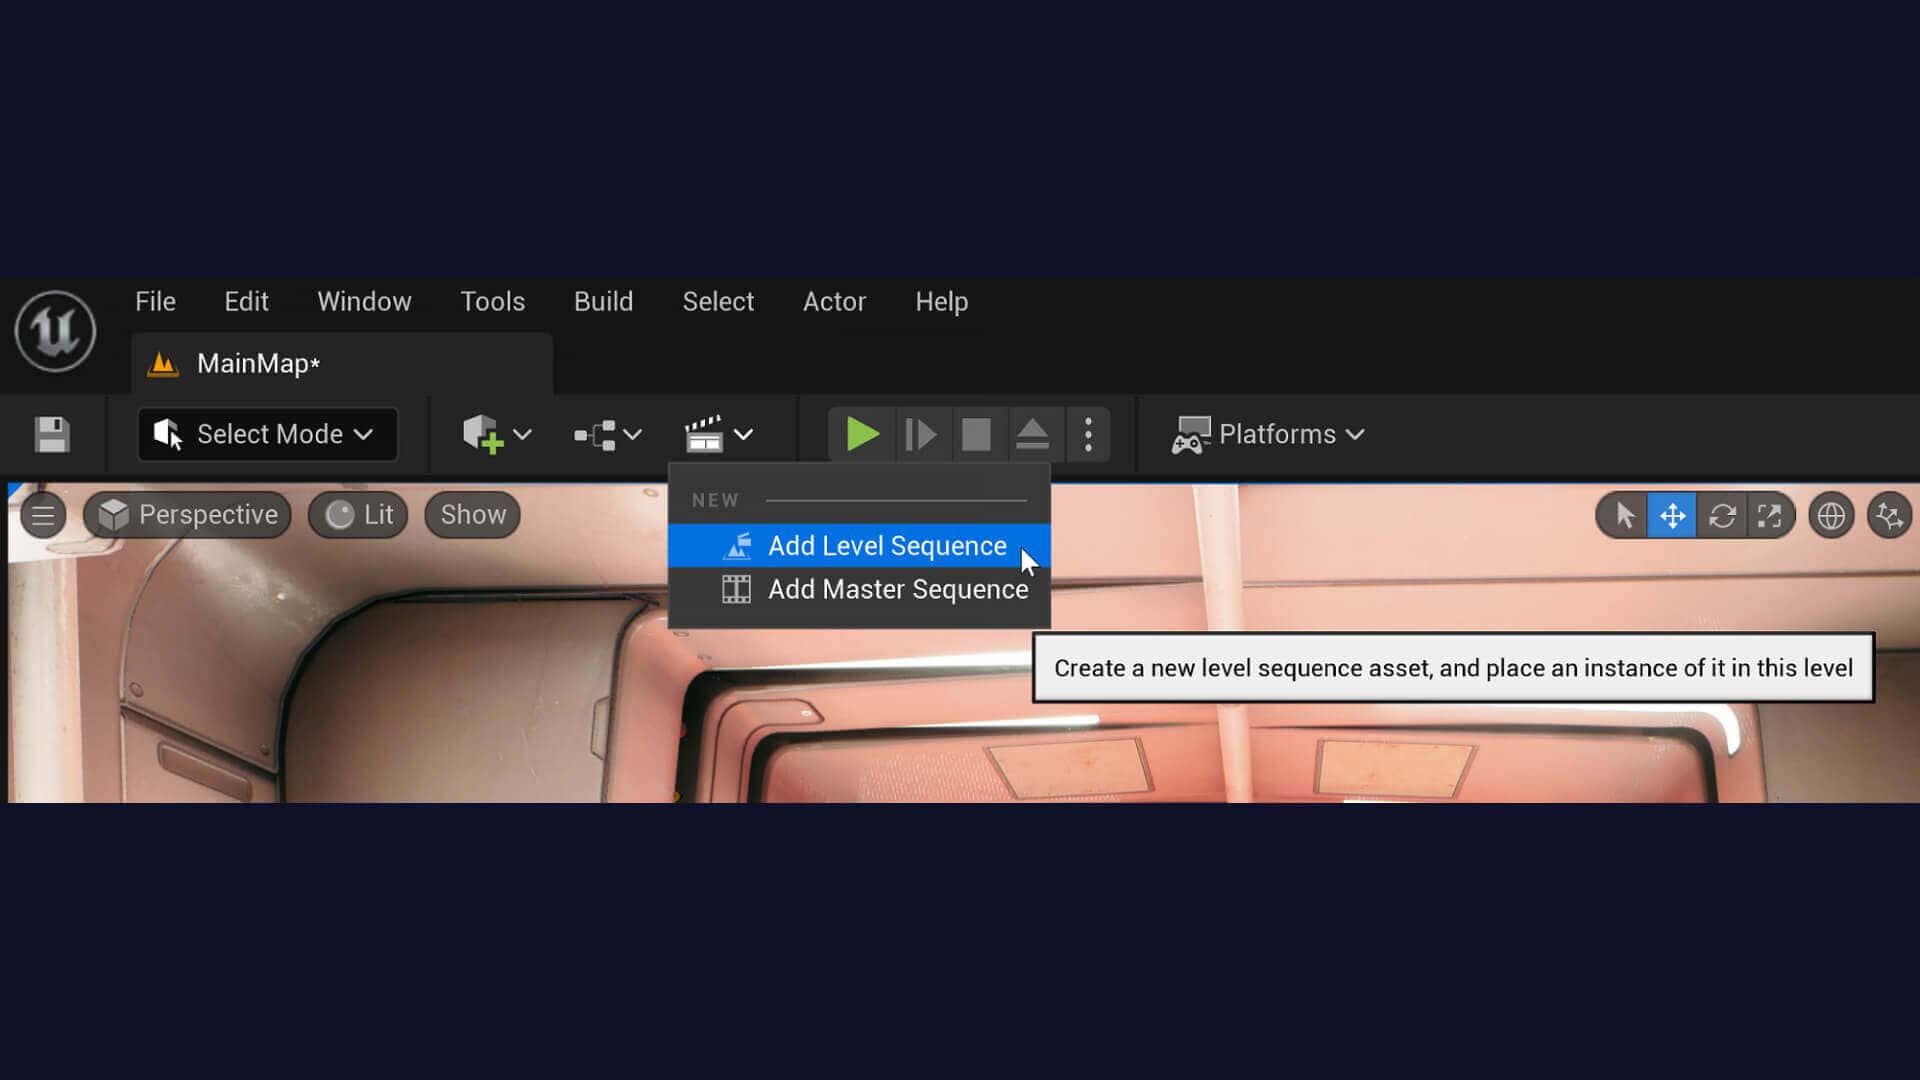
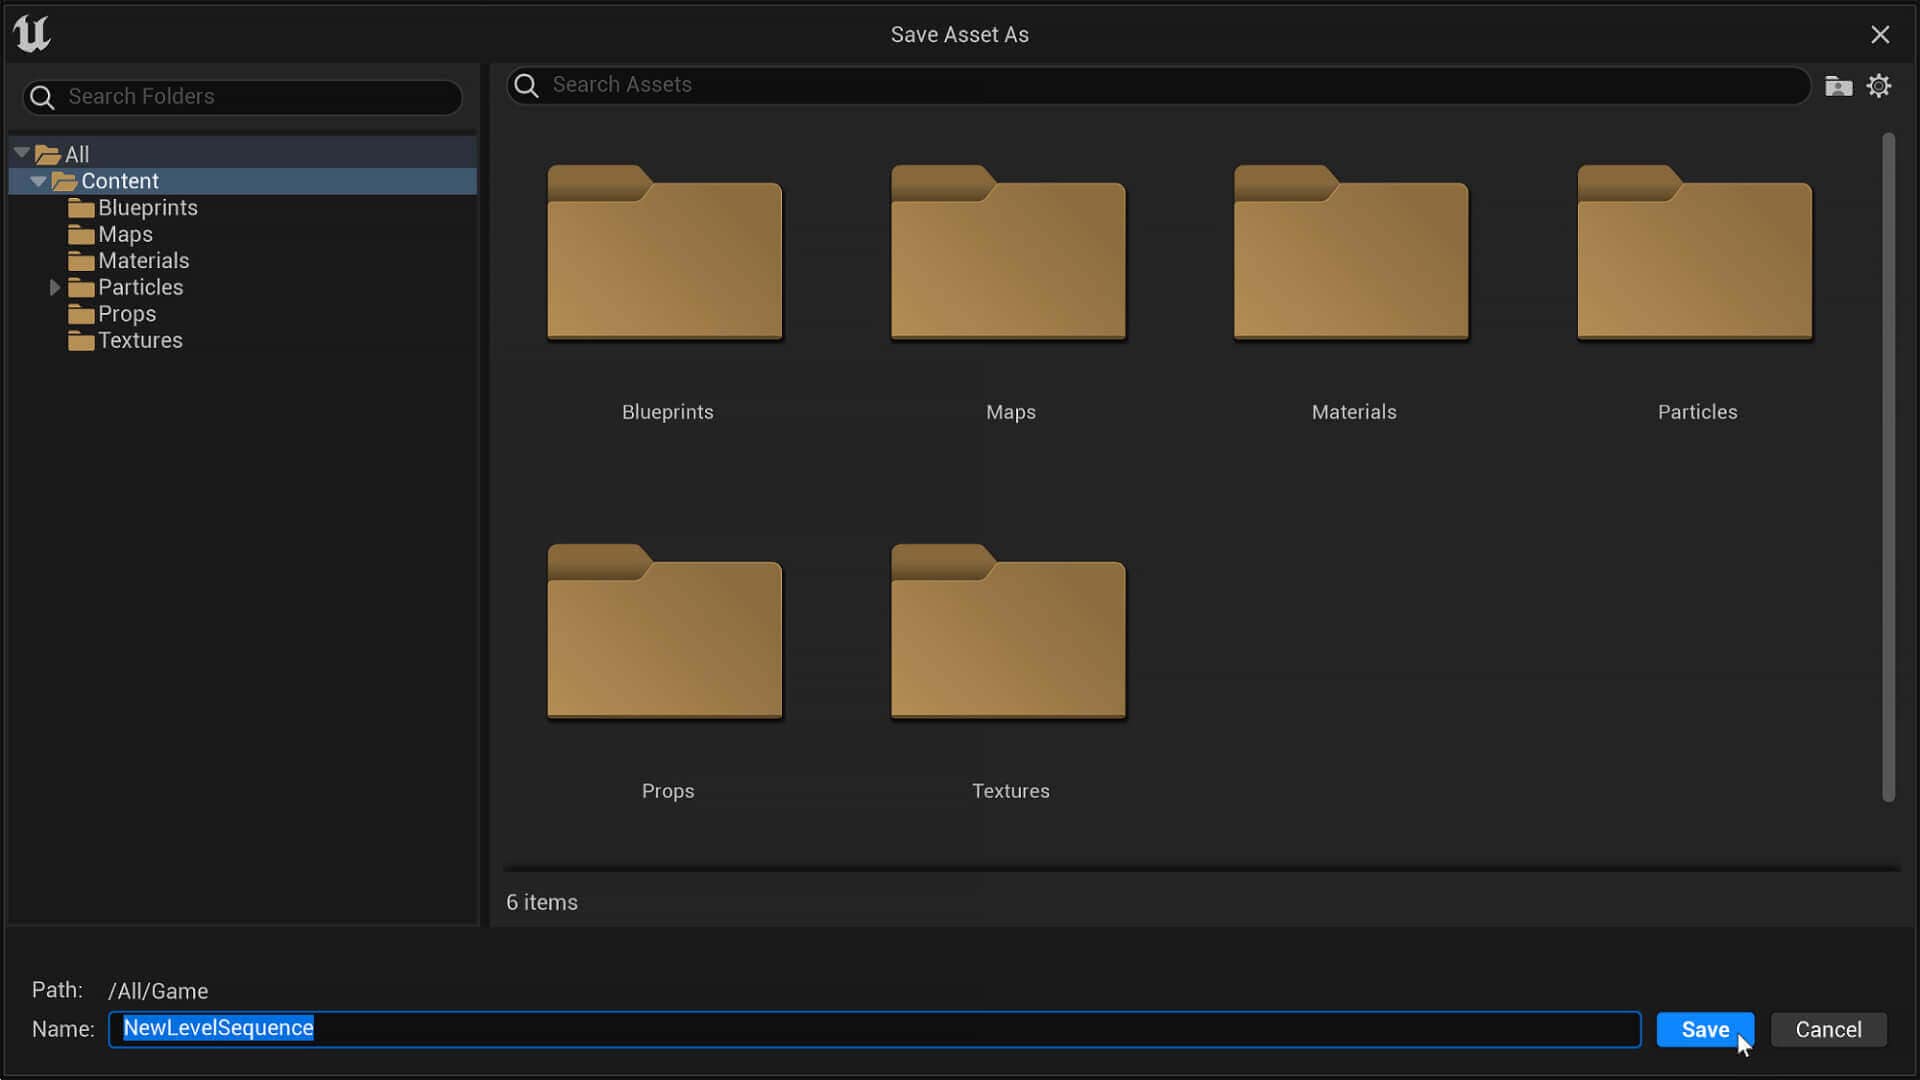
  1. On the Main Toolbar, click the Cinematics button, the one that looks like a film clapperboard, and choose Add Level Sequence. On the Save Asset As dialog that appears, note the name in the Name field, and click Save. This action will open the Sequencer module.
Note: If you accidentally close Sequencer, you can open it again by clicking Content Drawer at the bottom of your screen, or by pressing Ctrl+Space.
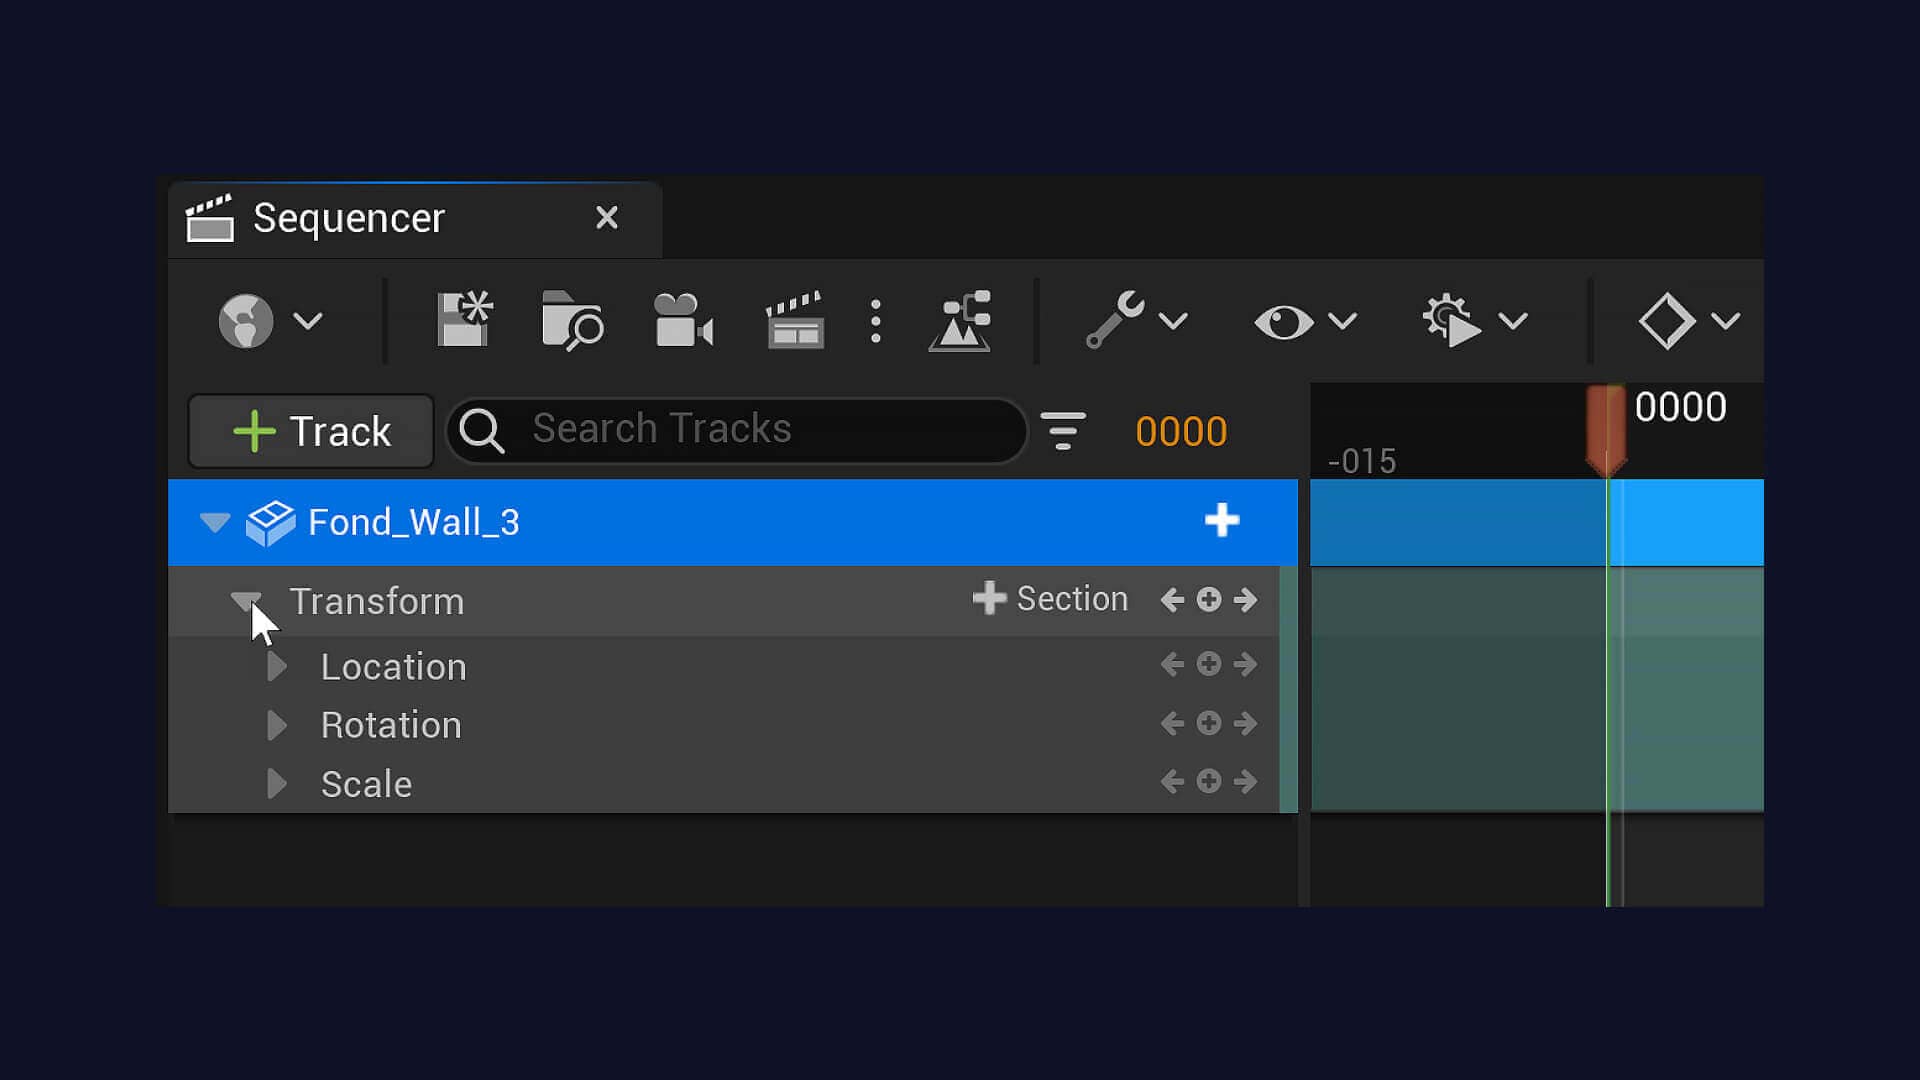
  1. In Sequencer, click the Track button at the upper left of the window. Choose the Actor to Sequencer option, and choose the object Fond_Wall_3. To quickly find the object in the list, you can type part of the object name in the search field.
This will create a track in Sequencer for the door object. Next, you will animate its location to slide the door up.
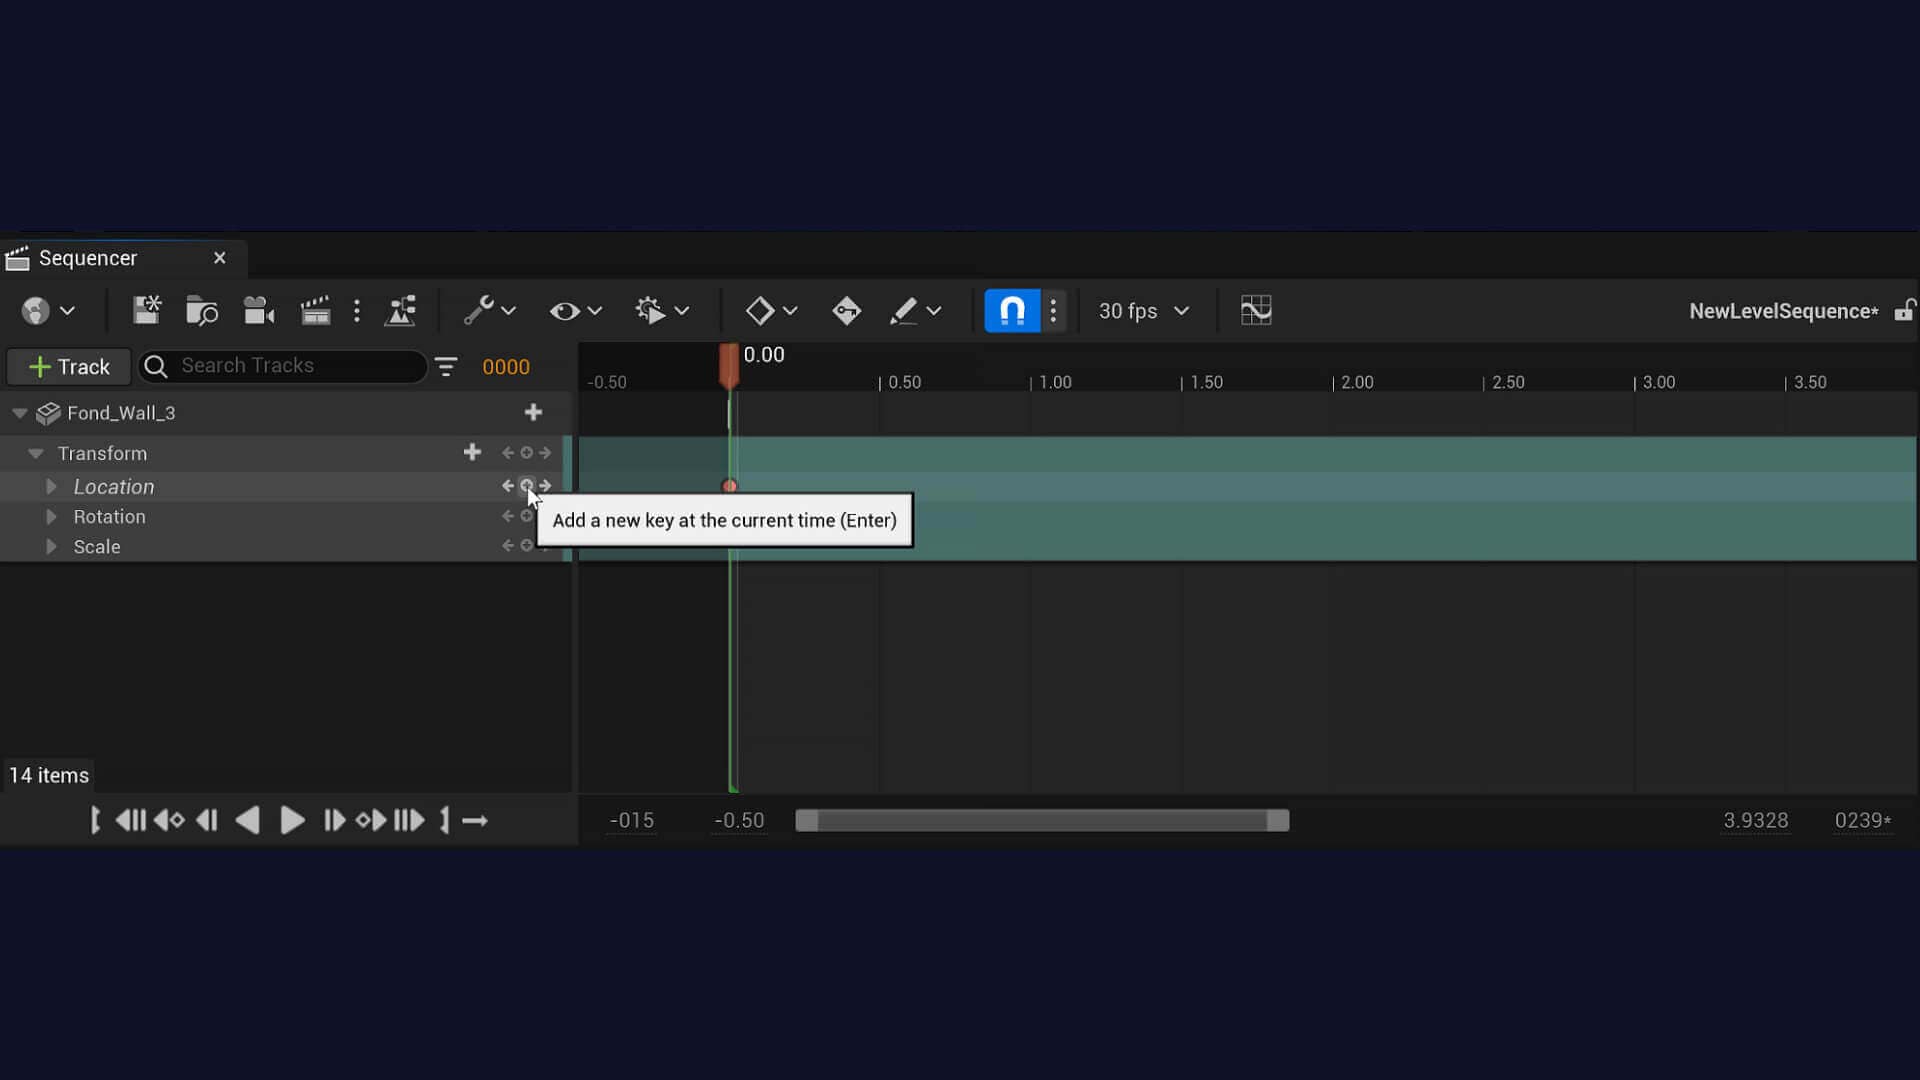
  1. In Sequencer, click the arrow to the left of Transform to expand the three transform tracks. You will be animating the Location track.
Note: the orange marker at 0000, which is called a playhead. The playhead’s current location is also displayed in orange text, just to the left of the keyframe area.
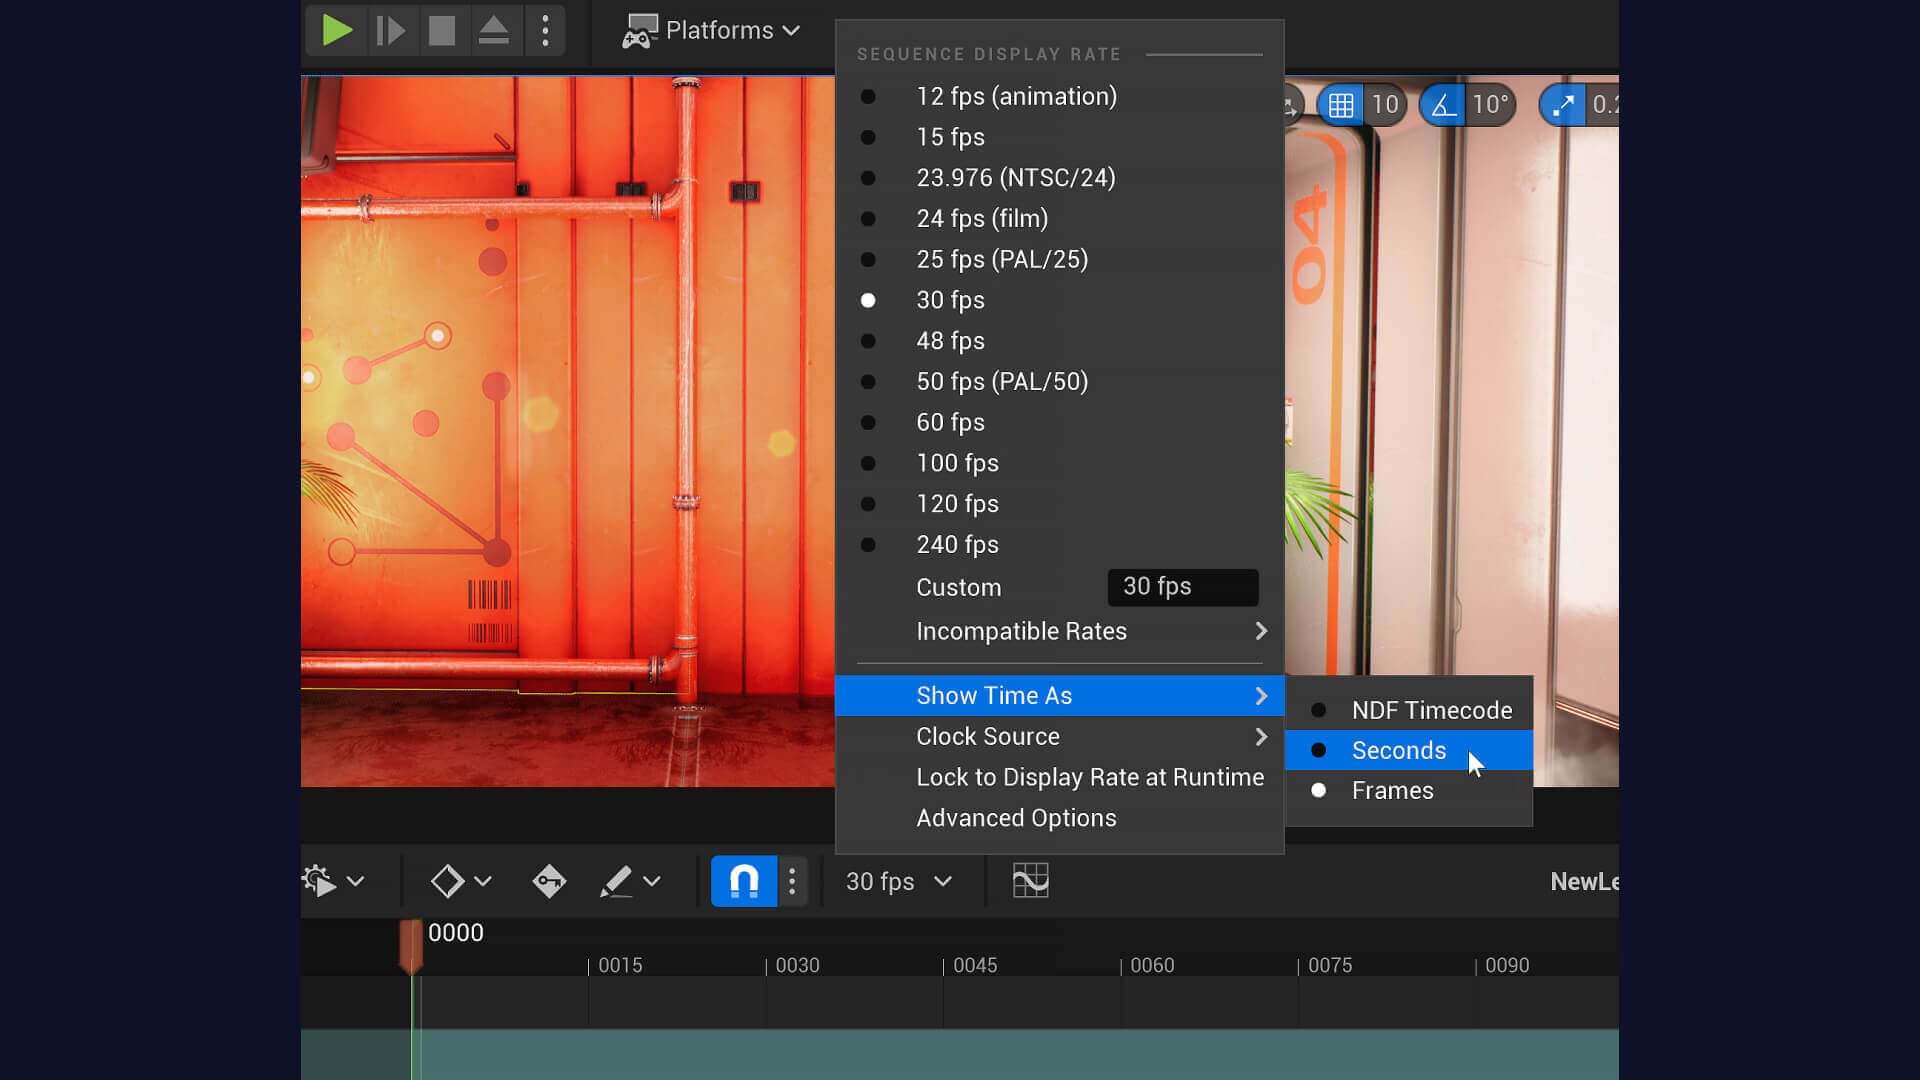
  1. Most animators work in frames per second, so by default, the time scale is displayed as a frame number.  For this beginner-style tutorial, we’re going to change the displayed time scale to seconds for easier readability. To do this, locate the Frames Per Second menu on the Sequencer toolbar. Choose Show Time As, and change the time display to Seconds.
  1. Next, you’ll set a keyframe at the 0.00 time for the wall’s position. On the Location track, click the + button to add a keyframe at 0.00.
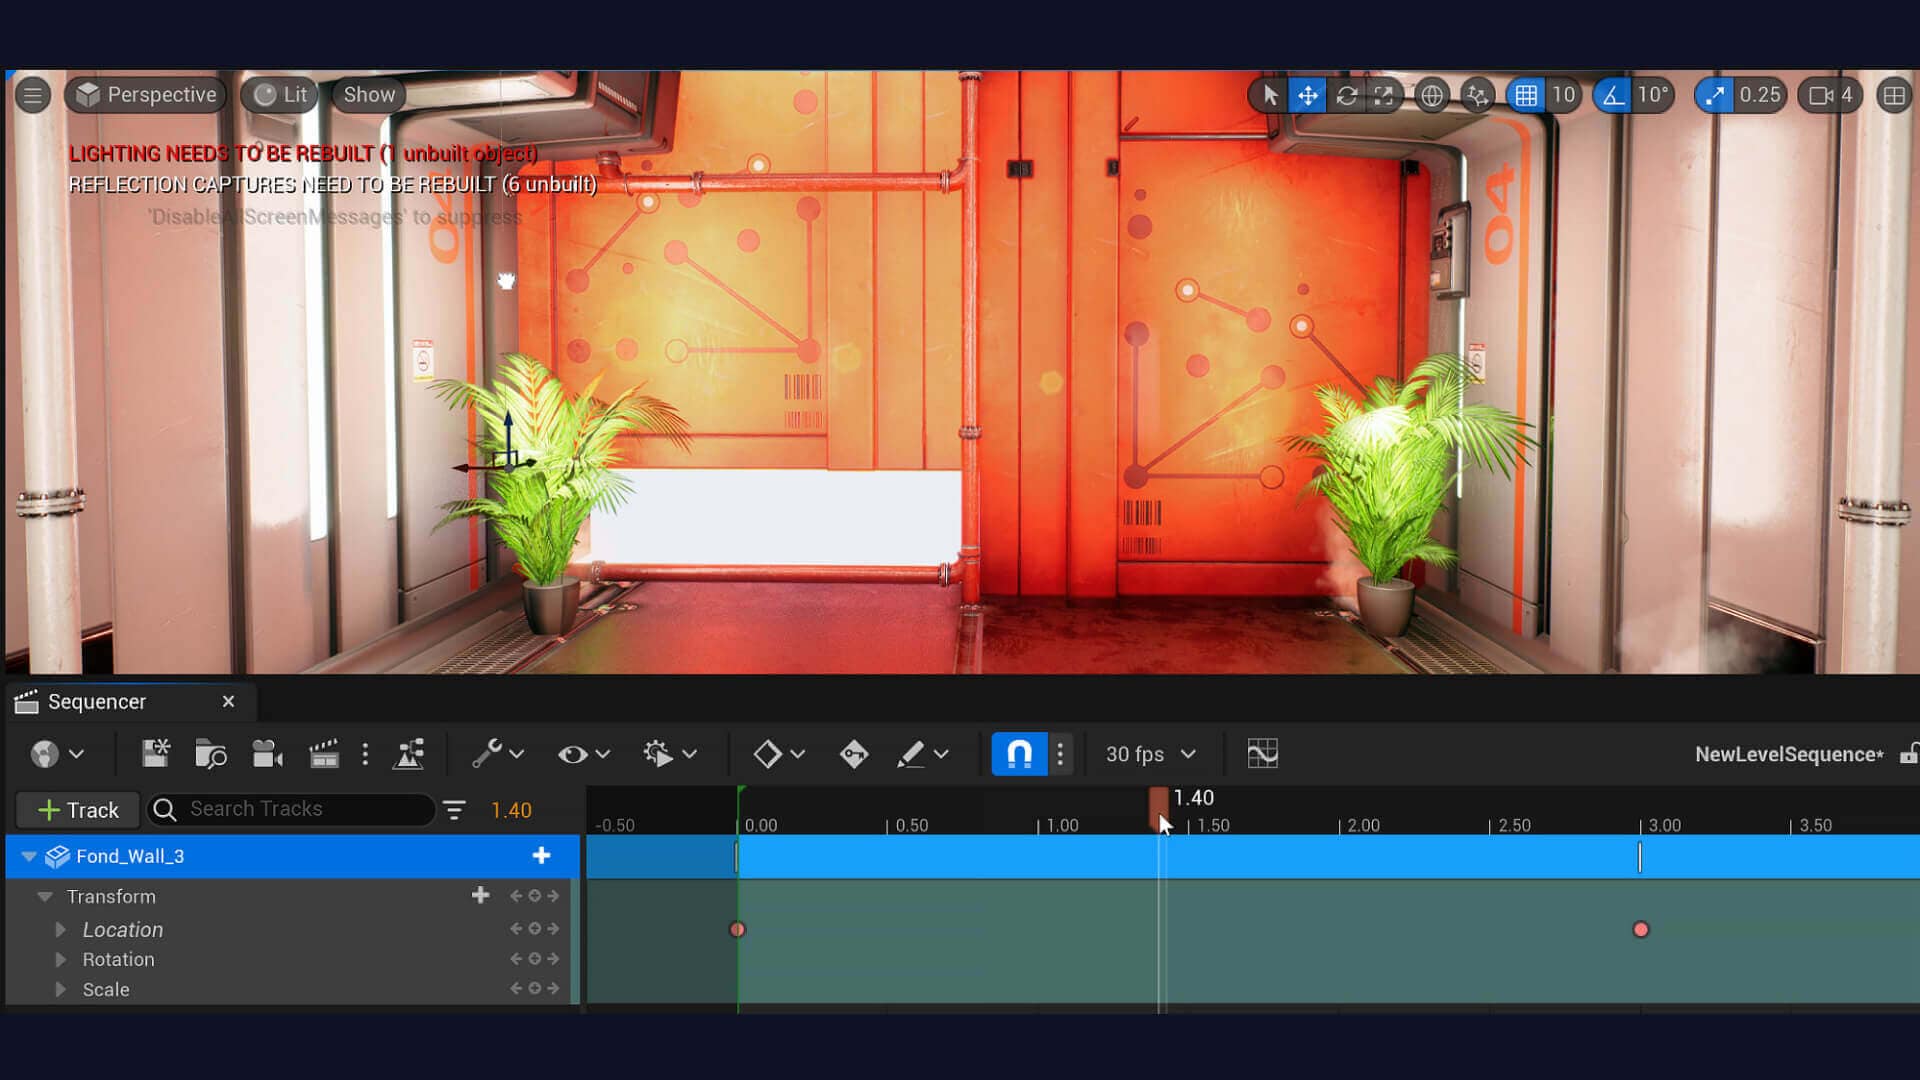
  1. The next step is to set a key for the door three seconds into the sequence. First, drag the orange playhead to the 3.00 mark.
  1. Make sure the door on the left is selected, and locate the tripod axis at the lower left corner of the door in the viewport. Drag the up-arrow of the axis upward to slide the door open.
  1. On the Location track, click the + button to add a keyframe at 3.00 seconds.
  2. Drag the playhead to scrub through the animation. You will see the door animate from a closed position at 0.00 seconds to an open position at 3.00 seconds. Congratulations, you just created an animation!
Now that you know how to set keyframes, you can animate any item you like by adding it to Sequencer as a track and moving it around. For example, you can open the other door with the same process: select the door, go to a keyframe, move the door, and set a key.

Now, let’s look at how you can output your animation for viewing. To do this, you first need a camera in the scene.
  1. On the Sequencer toolbar, click the Create Camera button (the camera icon) to create a camera in the scene. This will also create several tracks for the camera, including a Camera Cuts track where you can see frames of your animation.
The viewport will change to show what the camera sees, with the label “Pilot Active” at the upper left. This indicates that you can “pilot” the camera using viewport navigation controls. Use these controls to make the view look the way you want for rendering.

Now you are ready to output the animation to a movie file. When you render this scene with Unreal Engine, the rendering takes a fraction of a second per frame. 
  1. On the Sequencer toolbar, click the Render button (look for the slate icon) to open the Render Movie Settings dialog.
  1. In the Render Movie Settings dialog, make sure Image Output Format is set to Video Sequence (avi)
  2. Click the three dots to the right of the Output Directory field to open the Content folder for the project.
  3. Click and create a folder called Renders. Select that folder to return to the Render Movie Settings dialog.
  4. Click Capture Movie to render the movie to the folder. In the Save Content dialog, click Save Selected to save your scene before rendering.
The rendering will take a few seconds to complete. Now, you can watch the rendered movie.
  1. Outside of Unreal Engine, use your system’s folder navigation system (such as Windows File Explorer) to go to the Renders folder. Double-click the video in the folder to watch it with the video player of your choice. 
 

Continue your keyframe animation journey

To keep going with your animation education, you can continue to animate the scene above, or choose something else from the Unreal Engine Marketplace to practice with. You can also check out the Epic Developer Community, where you’ll find hundreds of hours of free online learning, including courses on animation.

The Unreal Engine documentation contains many useful articles on how to use Sequencer for animation. You can also get inspired by professional studios using Unreal Engine for animation at our Animation hub, and in our free Animation Field Guide.

If you'd like to get started with animating characters, you can also check out our real-time character animation training roundup.

More Real-Time Explainers


Related articles


Animation

Unreal Engine 5.4 is now available

Animation

We are updating Unreal Engine, Twinmotion, and RealityCapture pricing in late April

Animation

March Unreal Engine Marketplace sale: get 50% off over 2,000 products